SDK接入
第一步 获得 AppKey
在平台上注册帐号,可以任意添加新 App,每一个 App 都有一个唯一的 AppKey 作为标识。
第二步 集成SDK
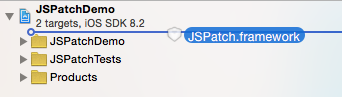
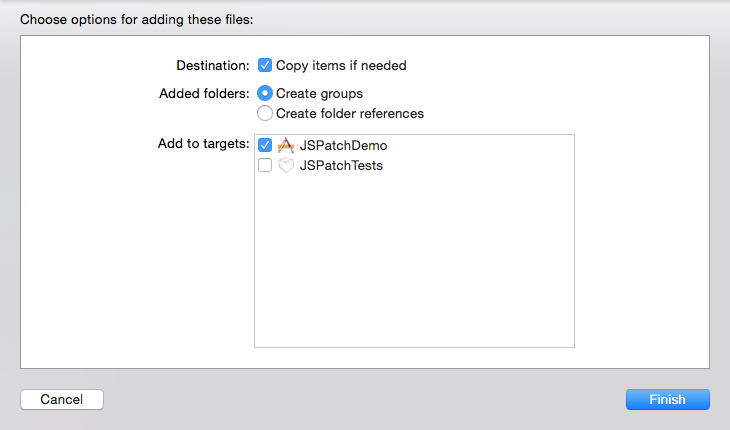
在本页左侧下载 SDK 后解压,将 JSPatchPlatform.framework 拖入项目中,勾选 "Copy items if needed",并确保 "Add to target" 勾选了相应的 target。
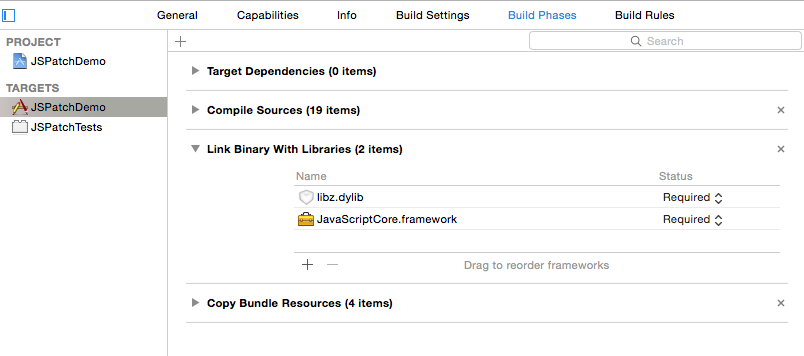
添加依赖框架:TARGETS -> Build Phases -> Link Binary With Libraries -> +
添加 libz.dylib 和 JavaScriptCore.framework。
注:SDK1.7 暂不支持 cocoapods 方式集成。
第三步 生成和配置RSA密钥
为了使你的 App 更安全,现强制要求用户使用自定义 RSA 密钥进行补丁下发,请按照 自定义 RSA 密钥 里的步骤生成 RSA 密钥对,并生成配置代码 [JSPatch setupRSAPublicKey:@"你的公钥"]。
第四步 运行
在 AppDelegate.m 里按顺序调用三个方法:
- 调用
+startWithAppKey:,参数为第一步获得的 AppKey。 - 调用第三步生成的密钥配置代码
[JSPatch setupRSAPublicKey:@"你的公钥"] - 最后调用
+sync方法检查补丁更新。
例子:
#import <JSPatchPlatform/JSPatch.h>
@implementation AppDelegate
- (BOOL)application:(UIApplication *)application didFinishLaunchingWithOptions:(NSDictionary *)launchOptions {
    [JSPatch startWithAppKey:@"你的AppKey"];
    [JSPatch setupRSAPublicKey:@"你的公钥"];
    [JSPatch sync];
    ...
}
@end
至此 JSPatch 接入完毕,下一步可以开始在后台为这个 App 添加 JS 补丁文件了。
上述例子是把 JSPatch 同步放在 -application:didFinishLaunchingWithOptions: 里,若希望补丁能及时推送,可以把 [JSPatch sync] 放在 -applicationDidBecomeActive: 里,每次唤醒都能同步更新 JSPatch 补丁,不需要等用户下次启动:
#import <JSPatchPlatform/JSPatch.h>
@implementation AppDelegate
- (BOOL)application:(UIApplication *)application didFinishLaunchingWithOptions:(NSDictionary *)launchOptions {
    [JSPatch startWithAppKey:@"你的AppKey"];
    [JSPatch setupRSAPublicKey:@"你的公钥"];
    ...
}
- (void)applicationDidBecomeActive:(UIApplication *)application {
    [JSPatch sync];
    ...
}
@end
常见问题
若使用 XCode8 接入,需要在项目 Capabilities 打开 Keychain Sharing 开关,否则在模拟器下载脚本后会出现 decompress error, md5 didn't match 错误(真机无论是否打开都没问题):
